
How I Designed and Built My Blog From Scratch

I've been wanting to start a blog for a while now, but I never got around to it. I finally decided to take the plunge and build my blog from scratch. I wanted to have full control over the design and functionality, so I decided to build it myself instead of using a platform like WordPress or Medium. I was inspired to do this after watching Eric Murphy's content on YouTube and seeing his own blog page.
In this post, I'll share the process of designing and building my blog, the tech stack I used, and some lessons I learned along the way.
Design
The first step in building my blog was designing it. I wanted a clean and minimalistic design that focused on the content. I started by sketching out some wireframes on sketch.io to get a rough idea of the layout and structure of the site. I limited my MVP to a homepage and a post page.
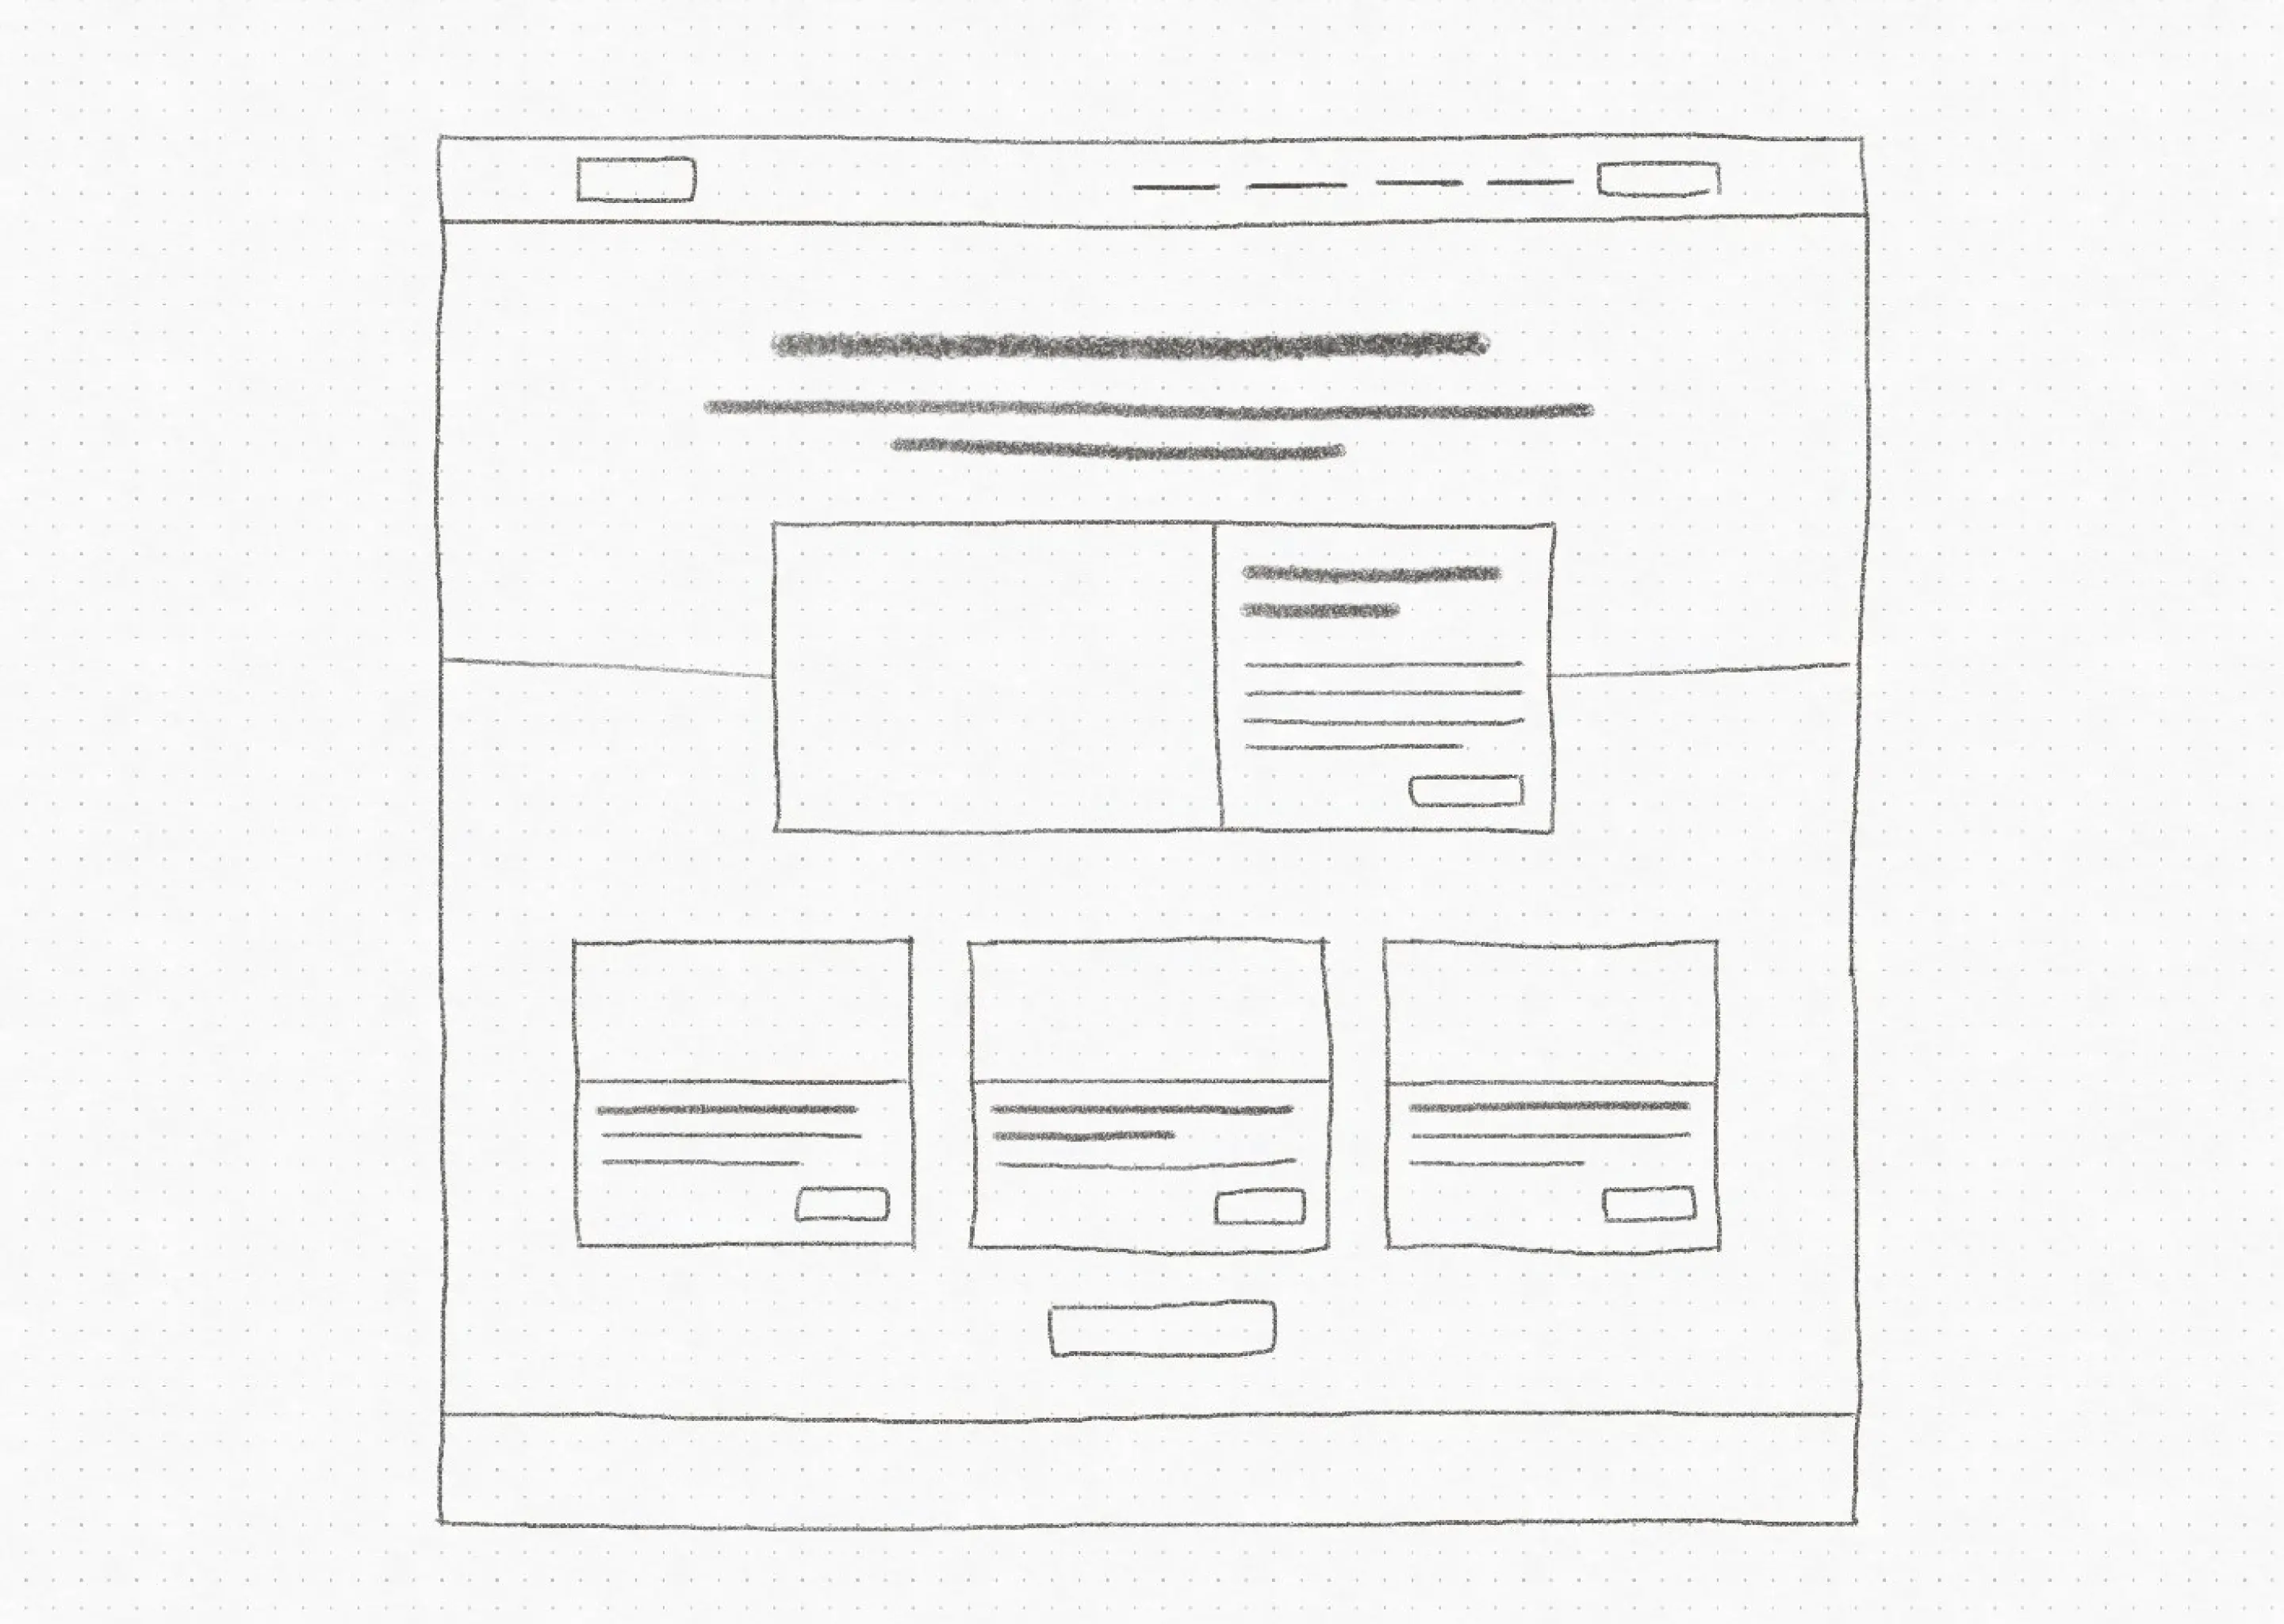
This wireframe had four main sections: a simple header with a logo and navigation links, a hero section with a brief introduction, a latest posts section with a list of recent posts, and a footer with social media links and copyright information. The latest posts section also had a featured post which would sit between the hero section and the list of recent posts so that it would be one of the first things visitors see when they land on the homepage.
Once I had a basic wireframe, I moved on to designing the site in Figma. Before playing around with different color schemes, fonts, and other details, I wanted to get the basic layout and structure of the site right, so I quickly implemented the wireframe with placeholder content and shades of gray.
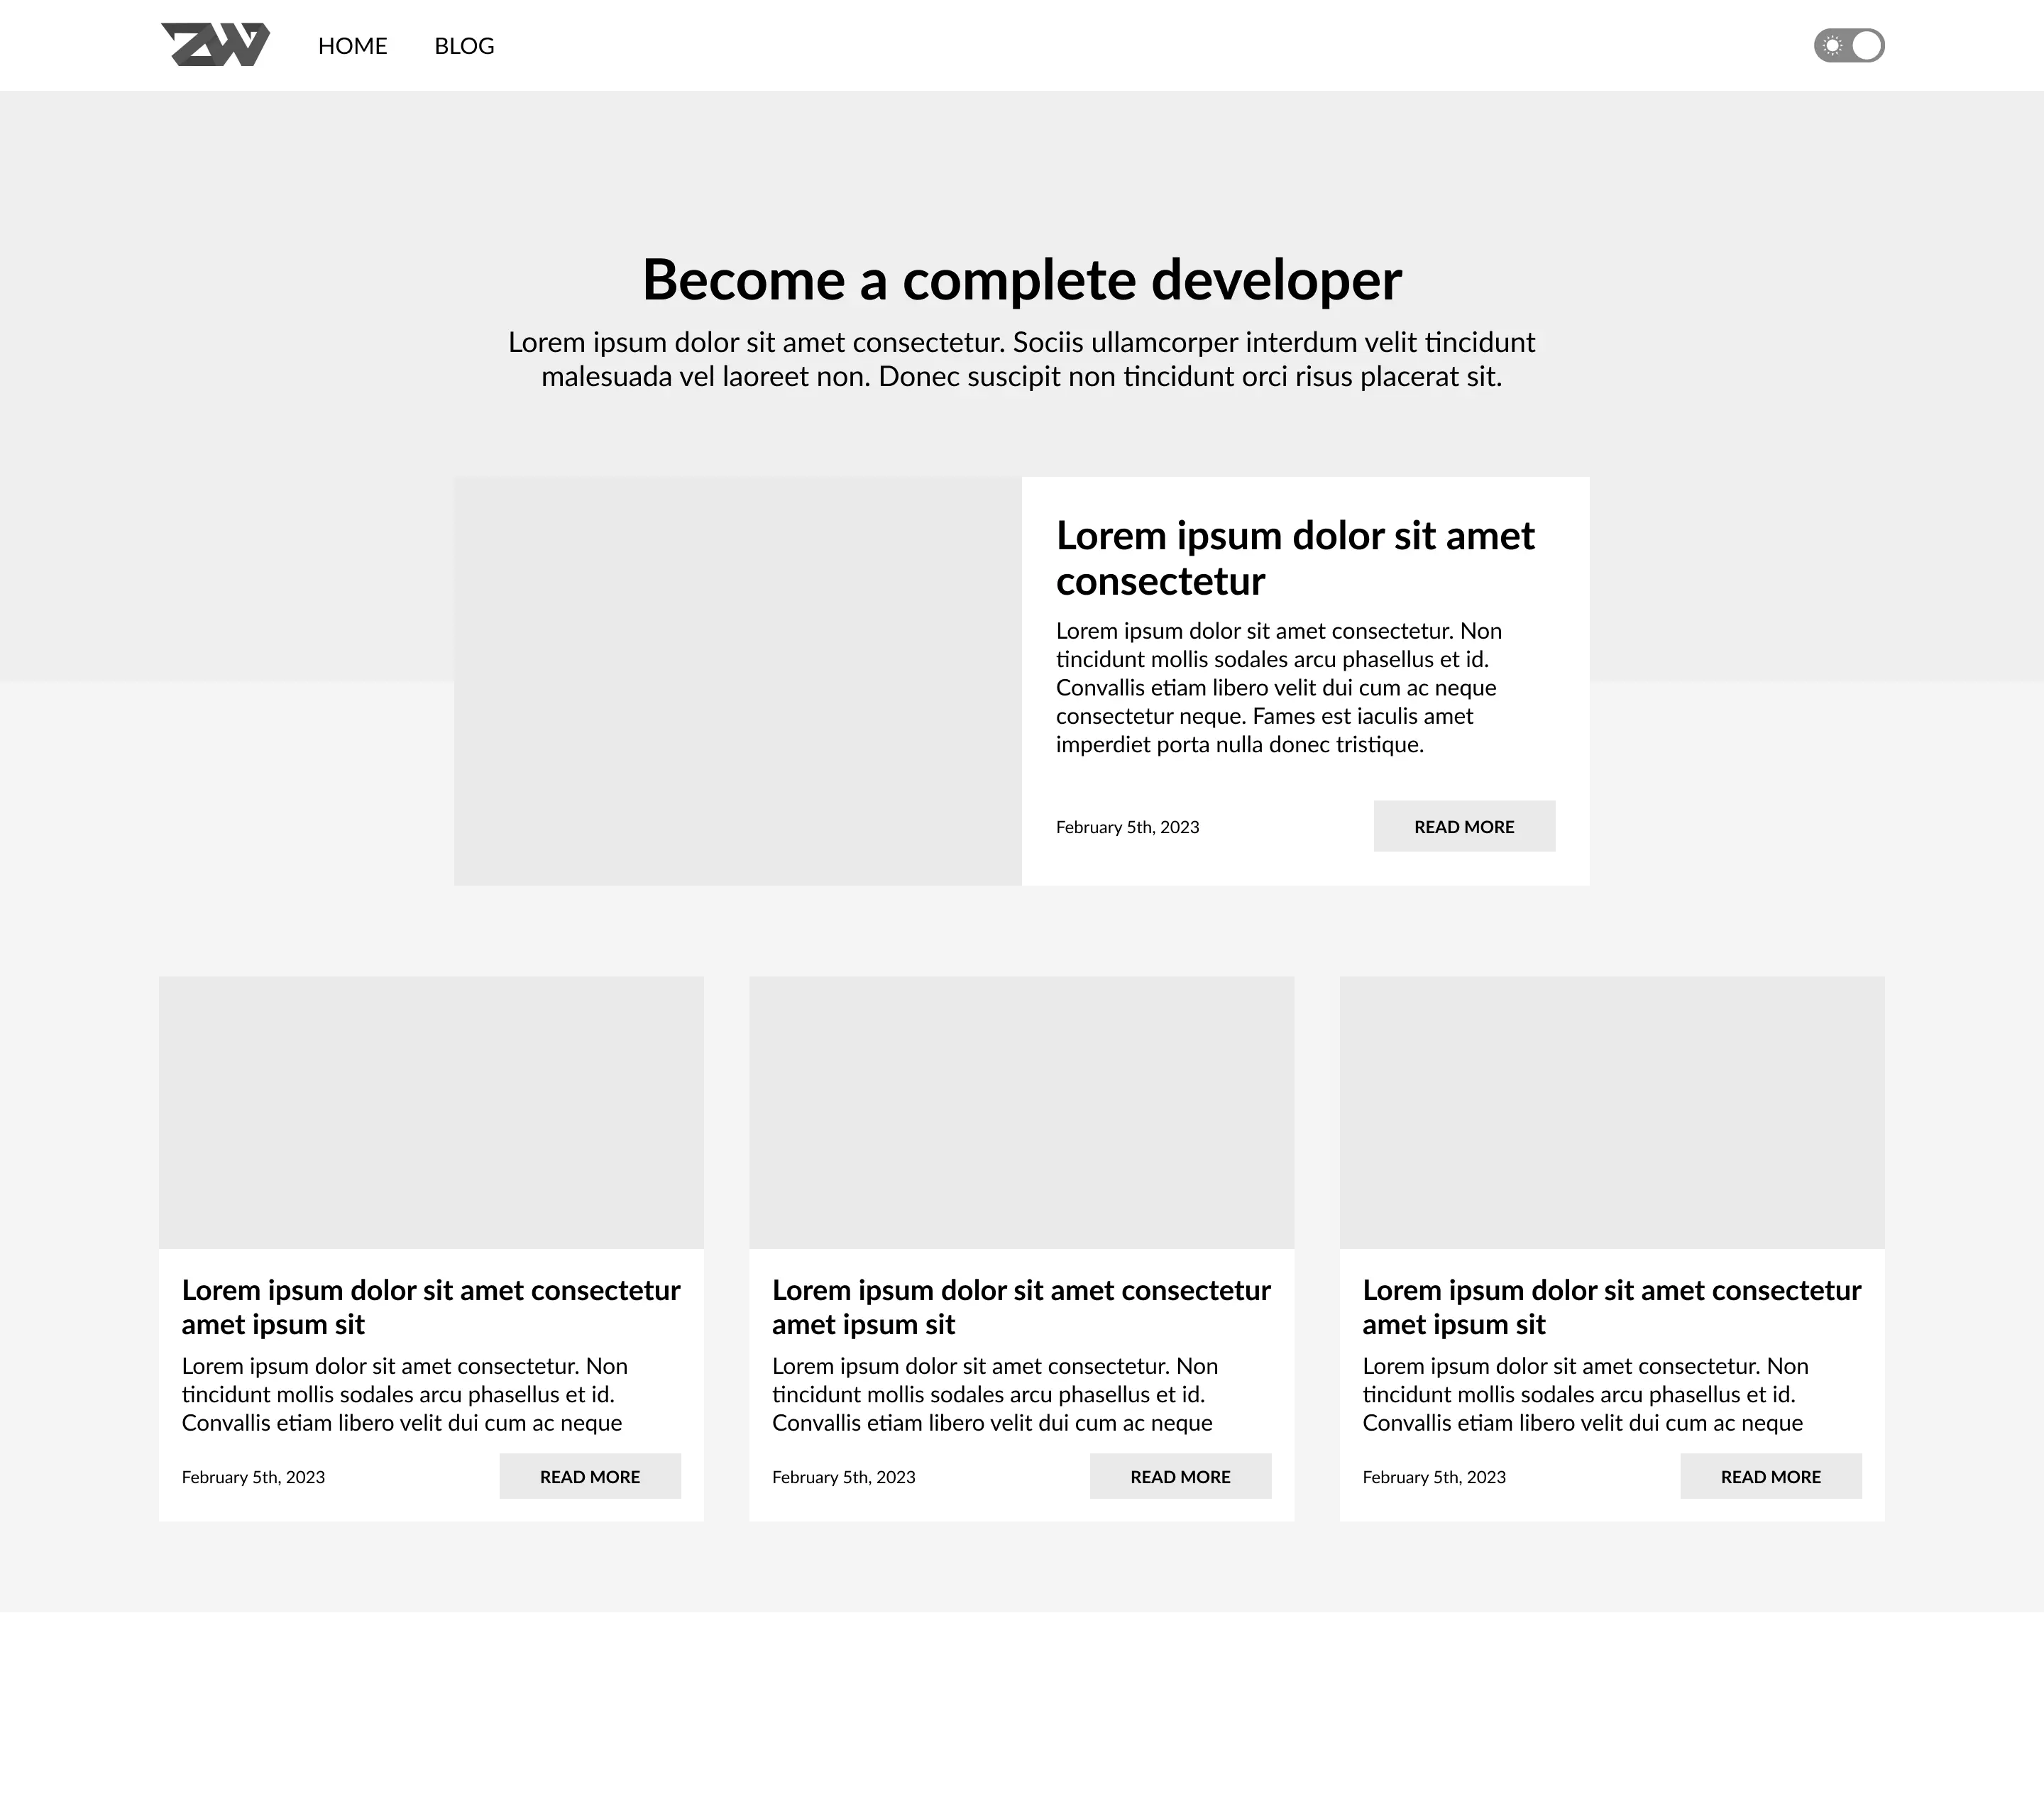
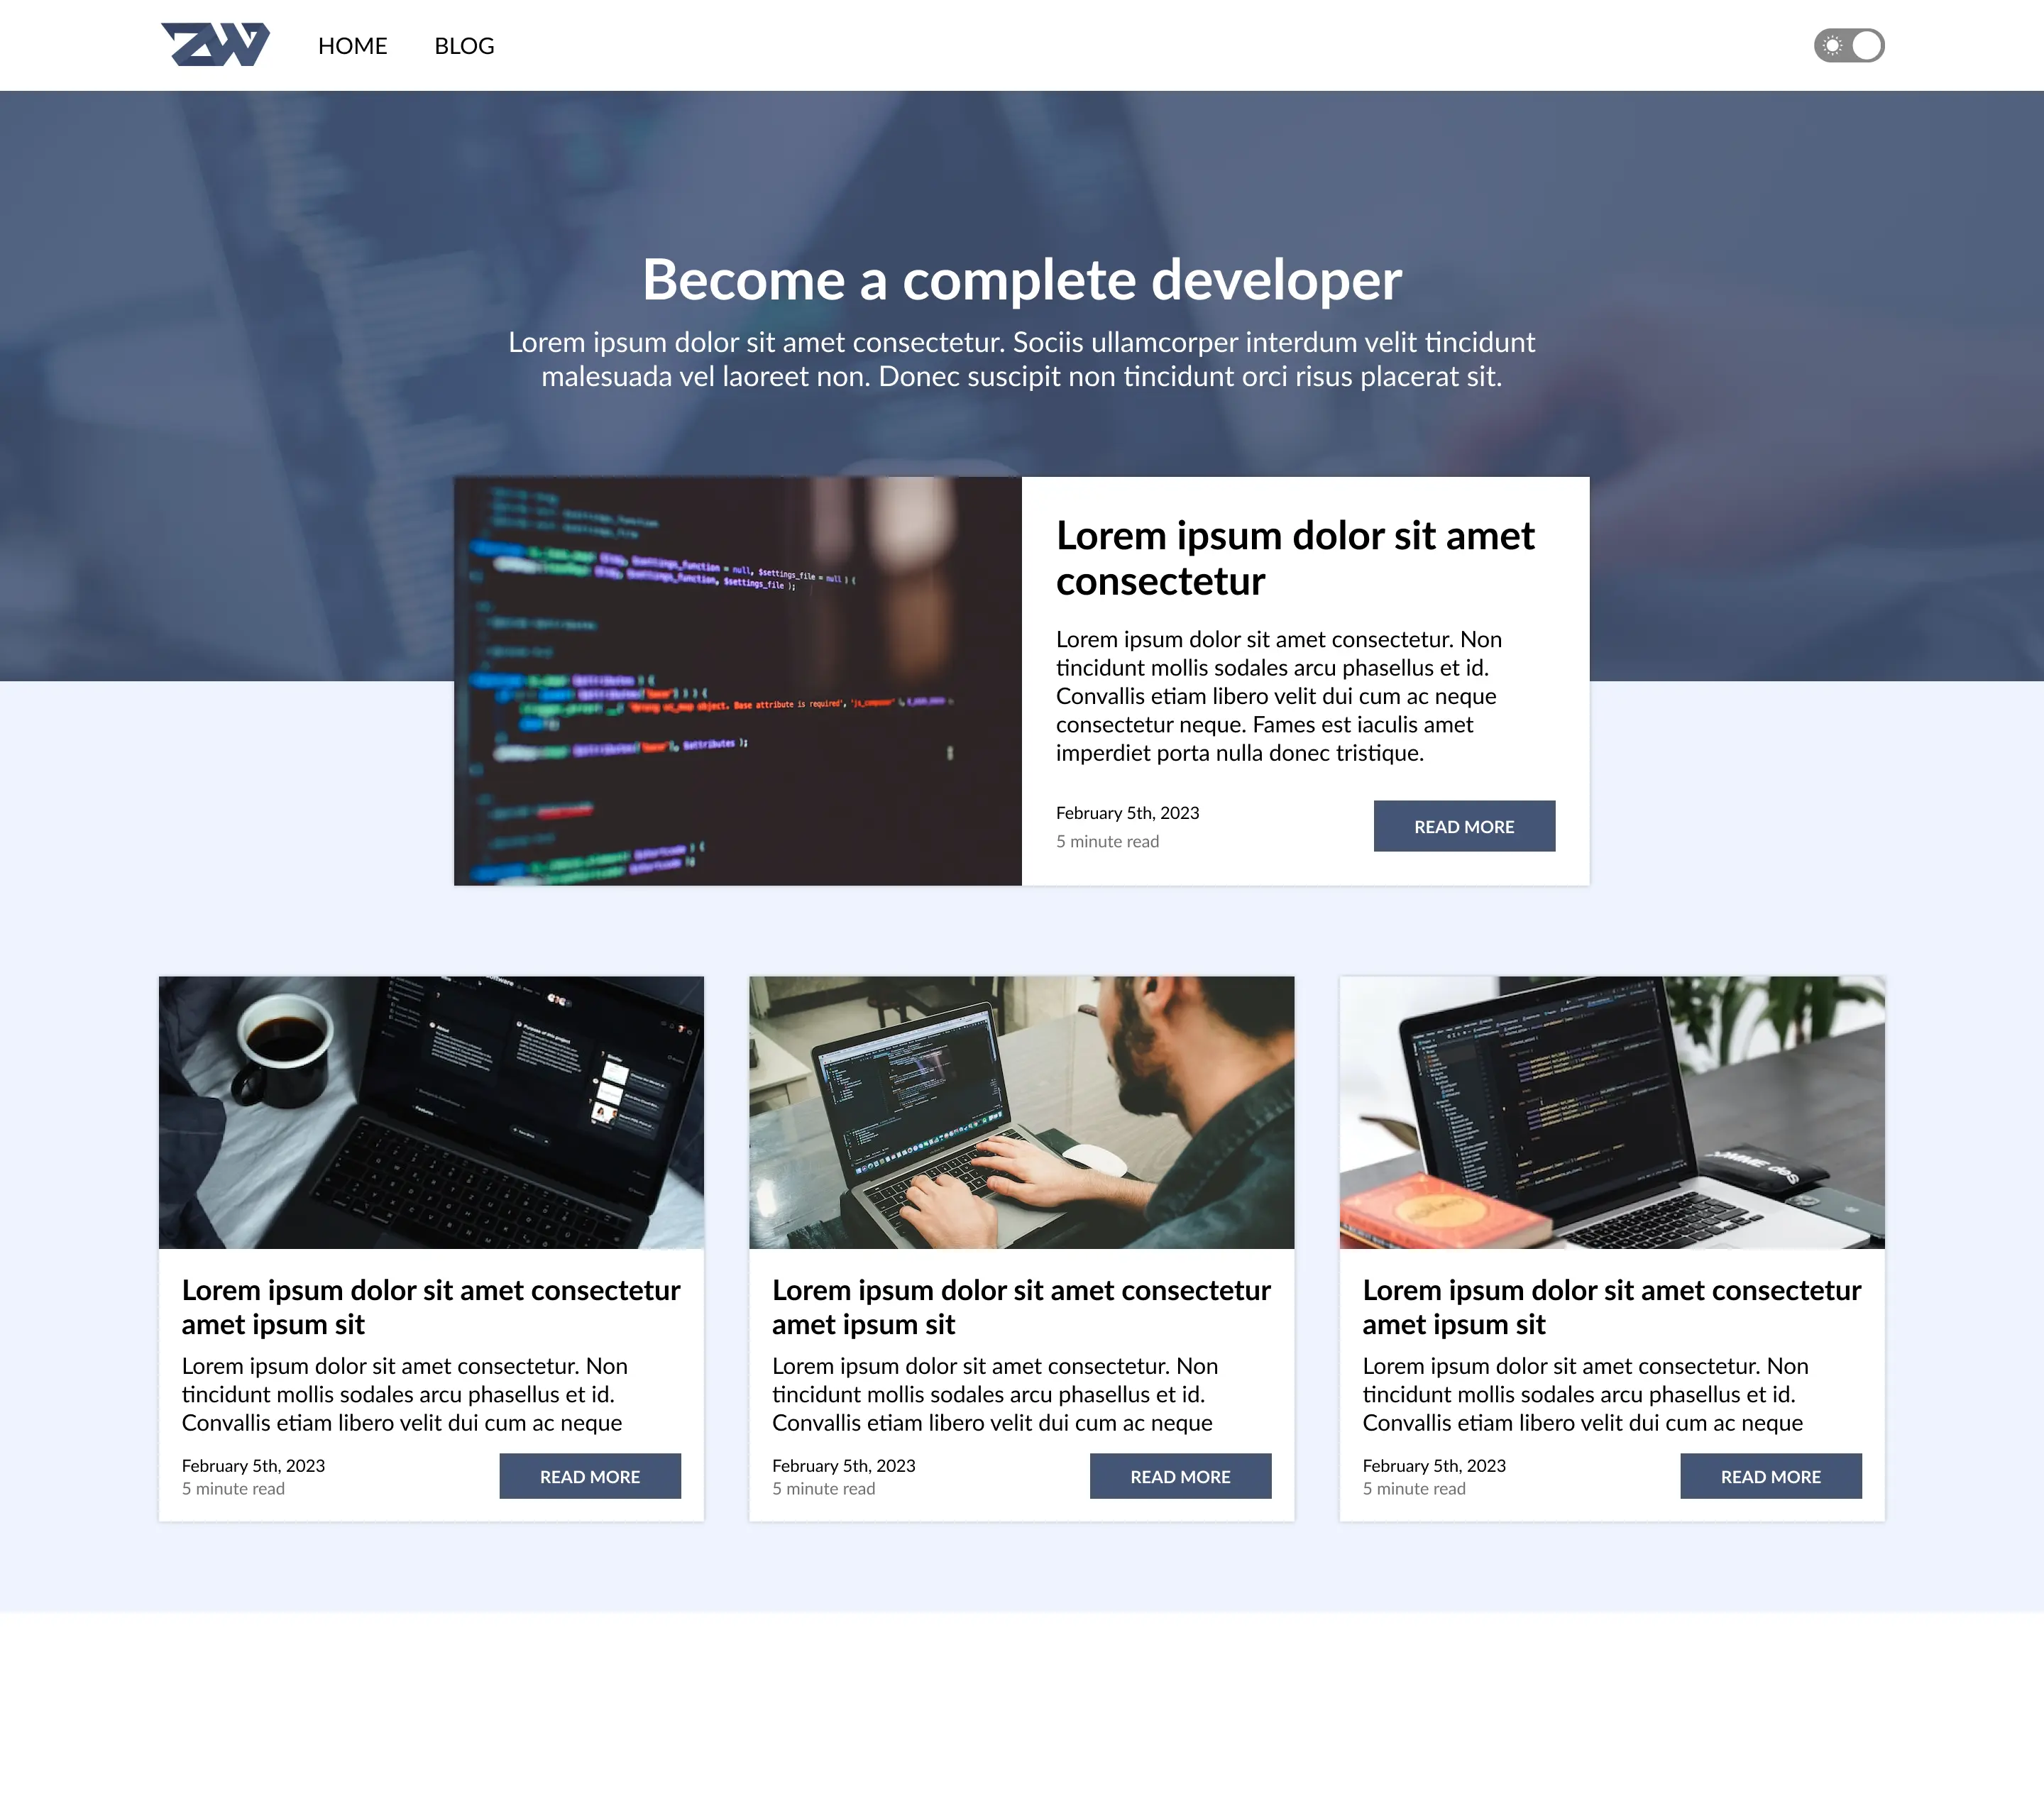
I then started experimenting to try and create a cohesive and visually appealing design. Since my logo already had a blue color scheme, I decided to use blue as the primary color for the site. I also liked Lato at the time so I chose it as the main font. I landed at this:
Home page
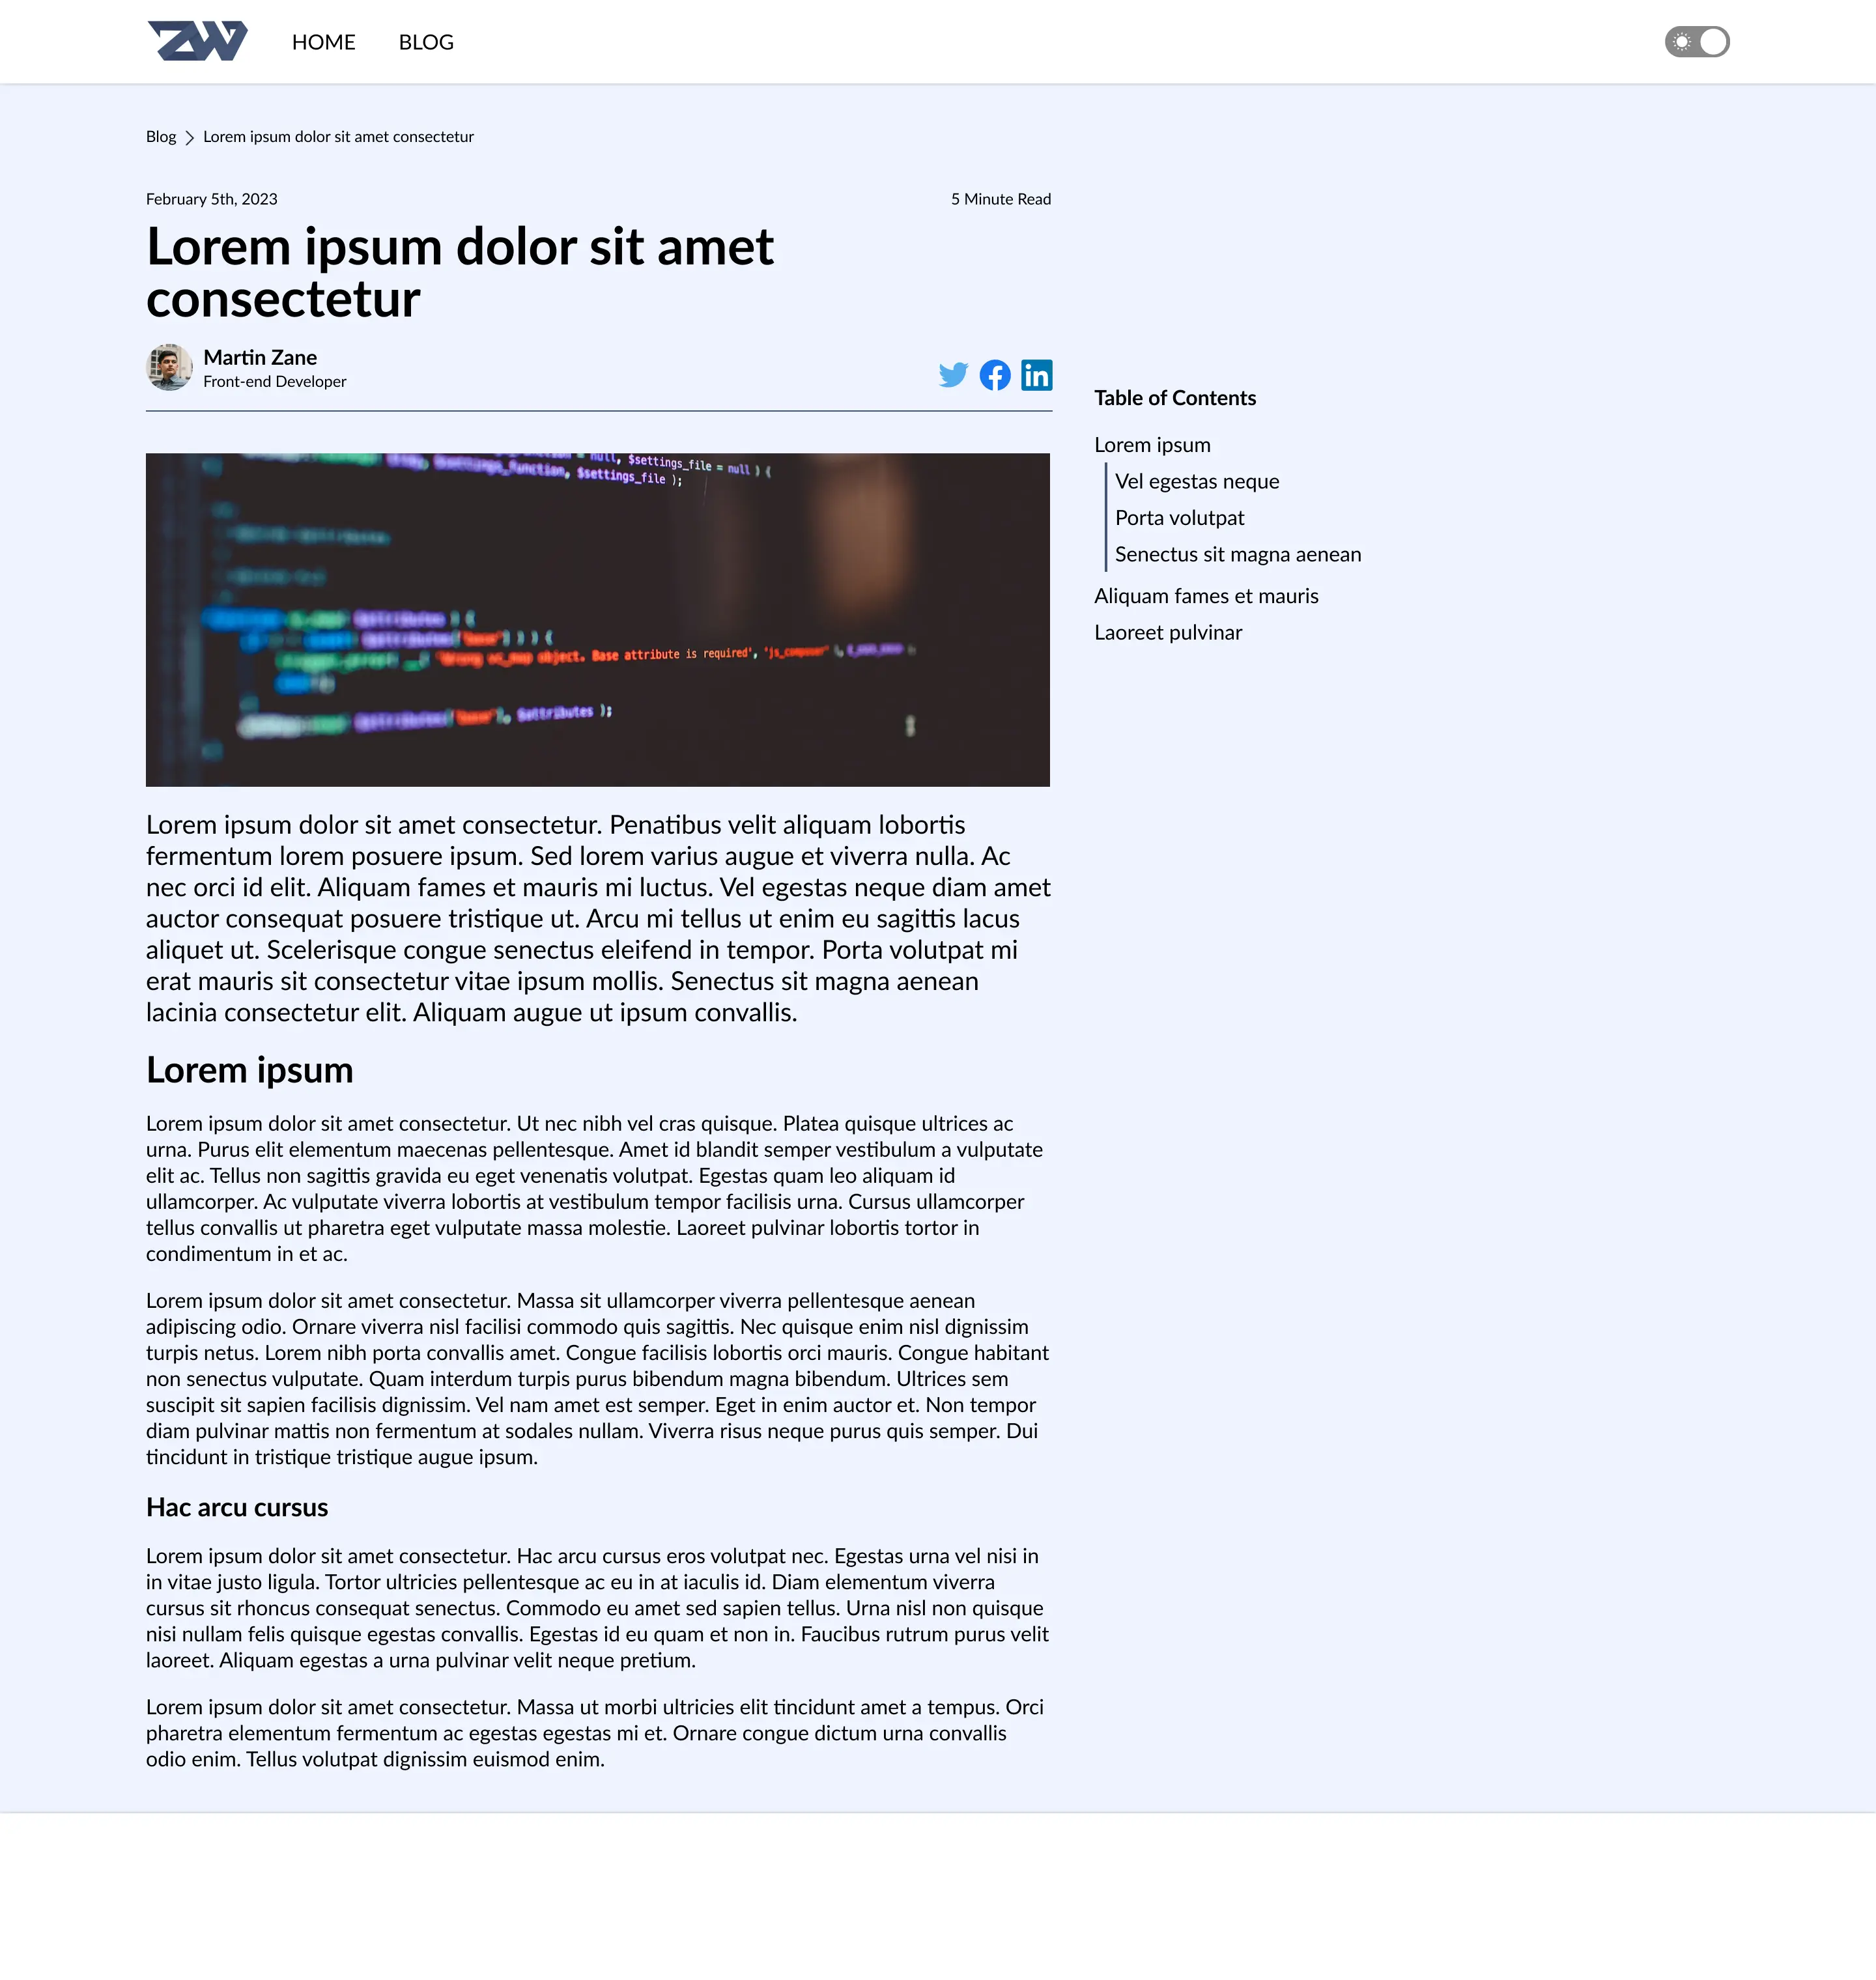
Post page
And then, my friends, something that happens many of us who want to build a side-project happened to me: I took a break for a couple of days, then life got in the way and I kind of forgot about the project, and before I knew it several months had passed.
Re-design
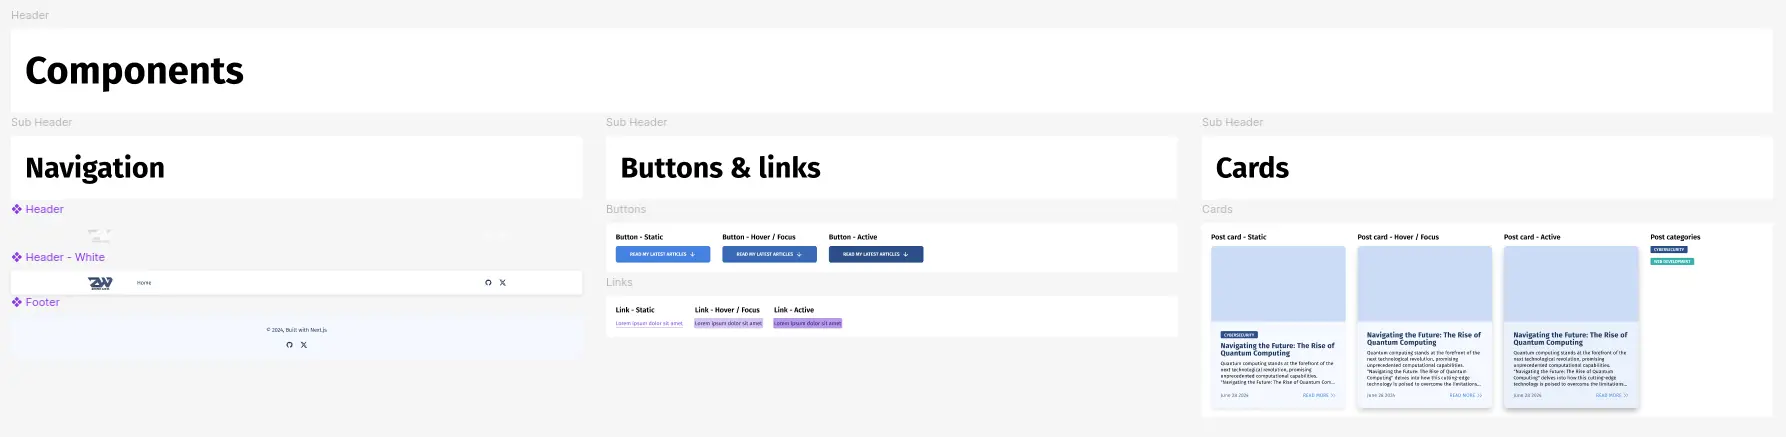
When I finally got back to the project, I realized that I didn't like the design anymore. It looked old and outdated, and I wanted something more modern and fresh. I decided to start from scratch and redesign the site, but this time limit the scope a little bit more. I also wanted to put more effort into the design system and components, so that I could reuse them throughout the site and scale it more easily in the future. This is what I ended up with for the design system and components:
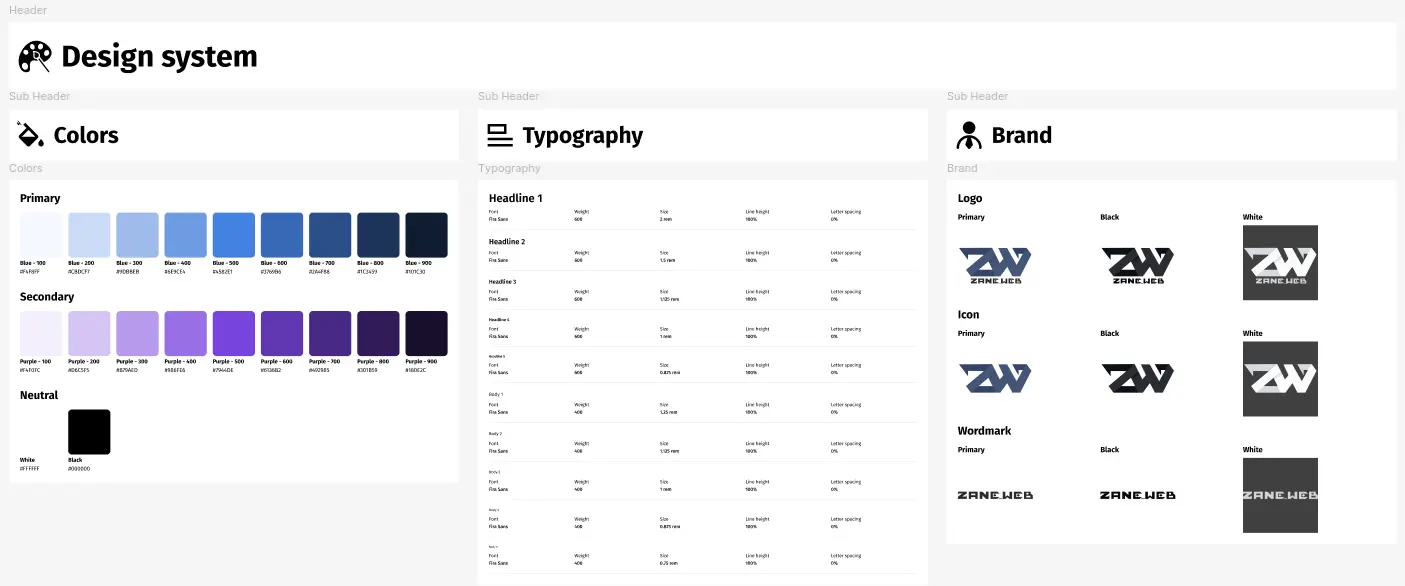
As you can see, I defined a color palette with primary, secondary, and neutral colors, as well as a typography system with different headings and paragraphs. I added 9 shades for the primary and secondary colors to give me more flexibility when designing the site.
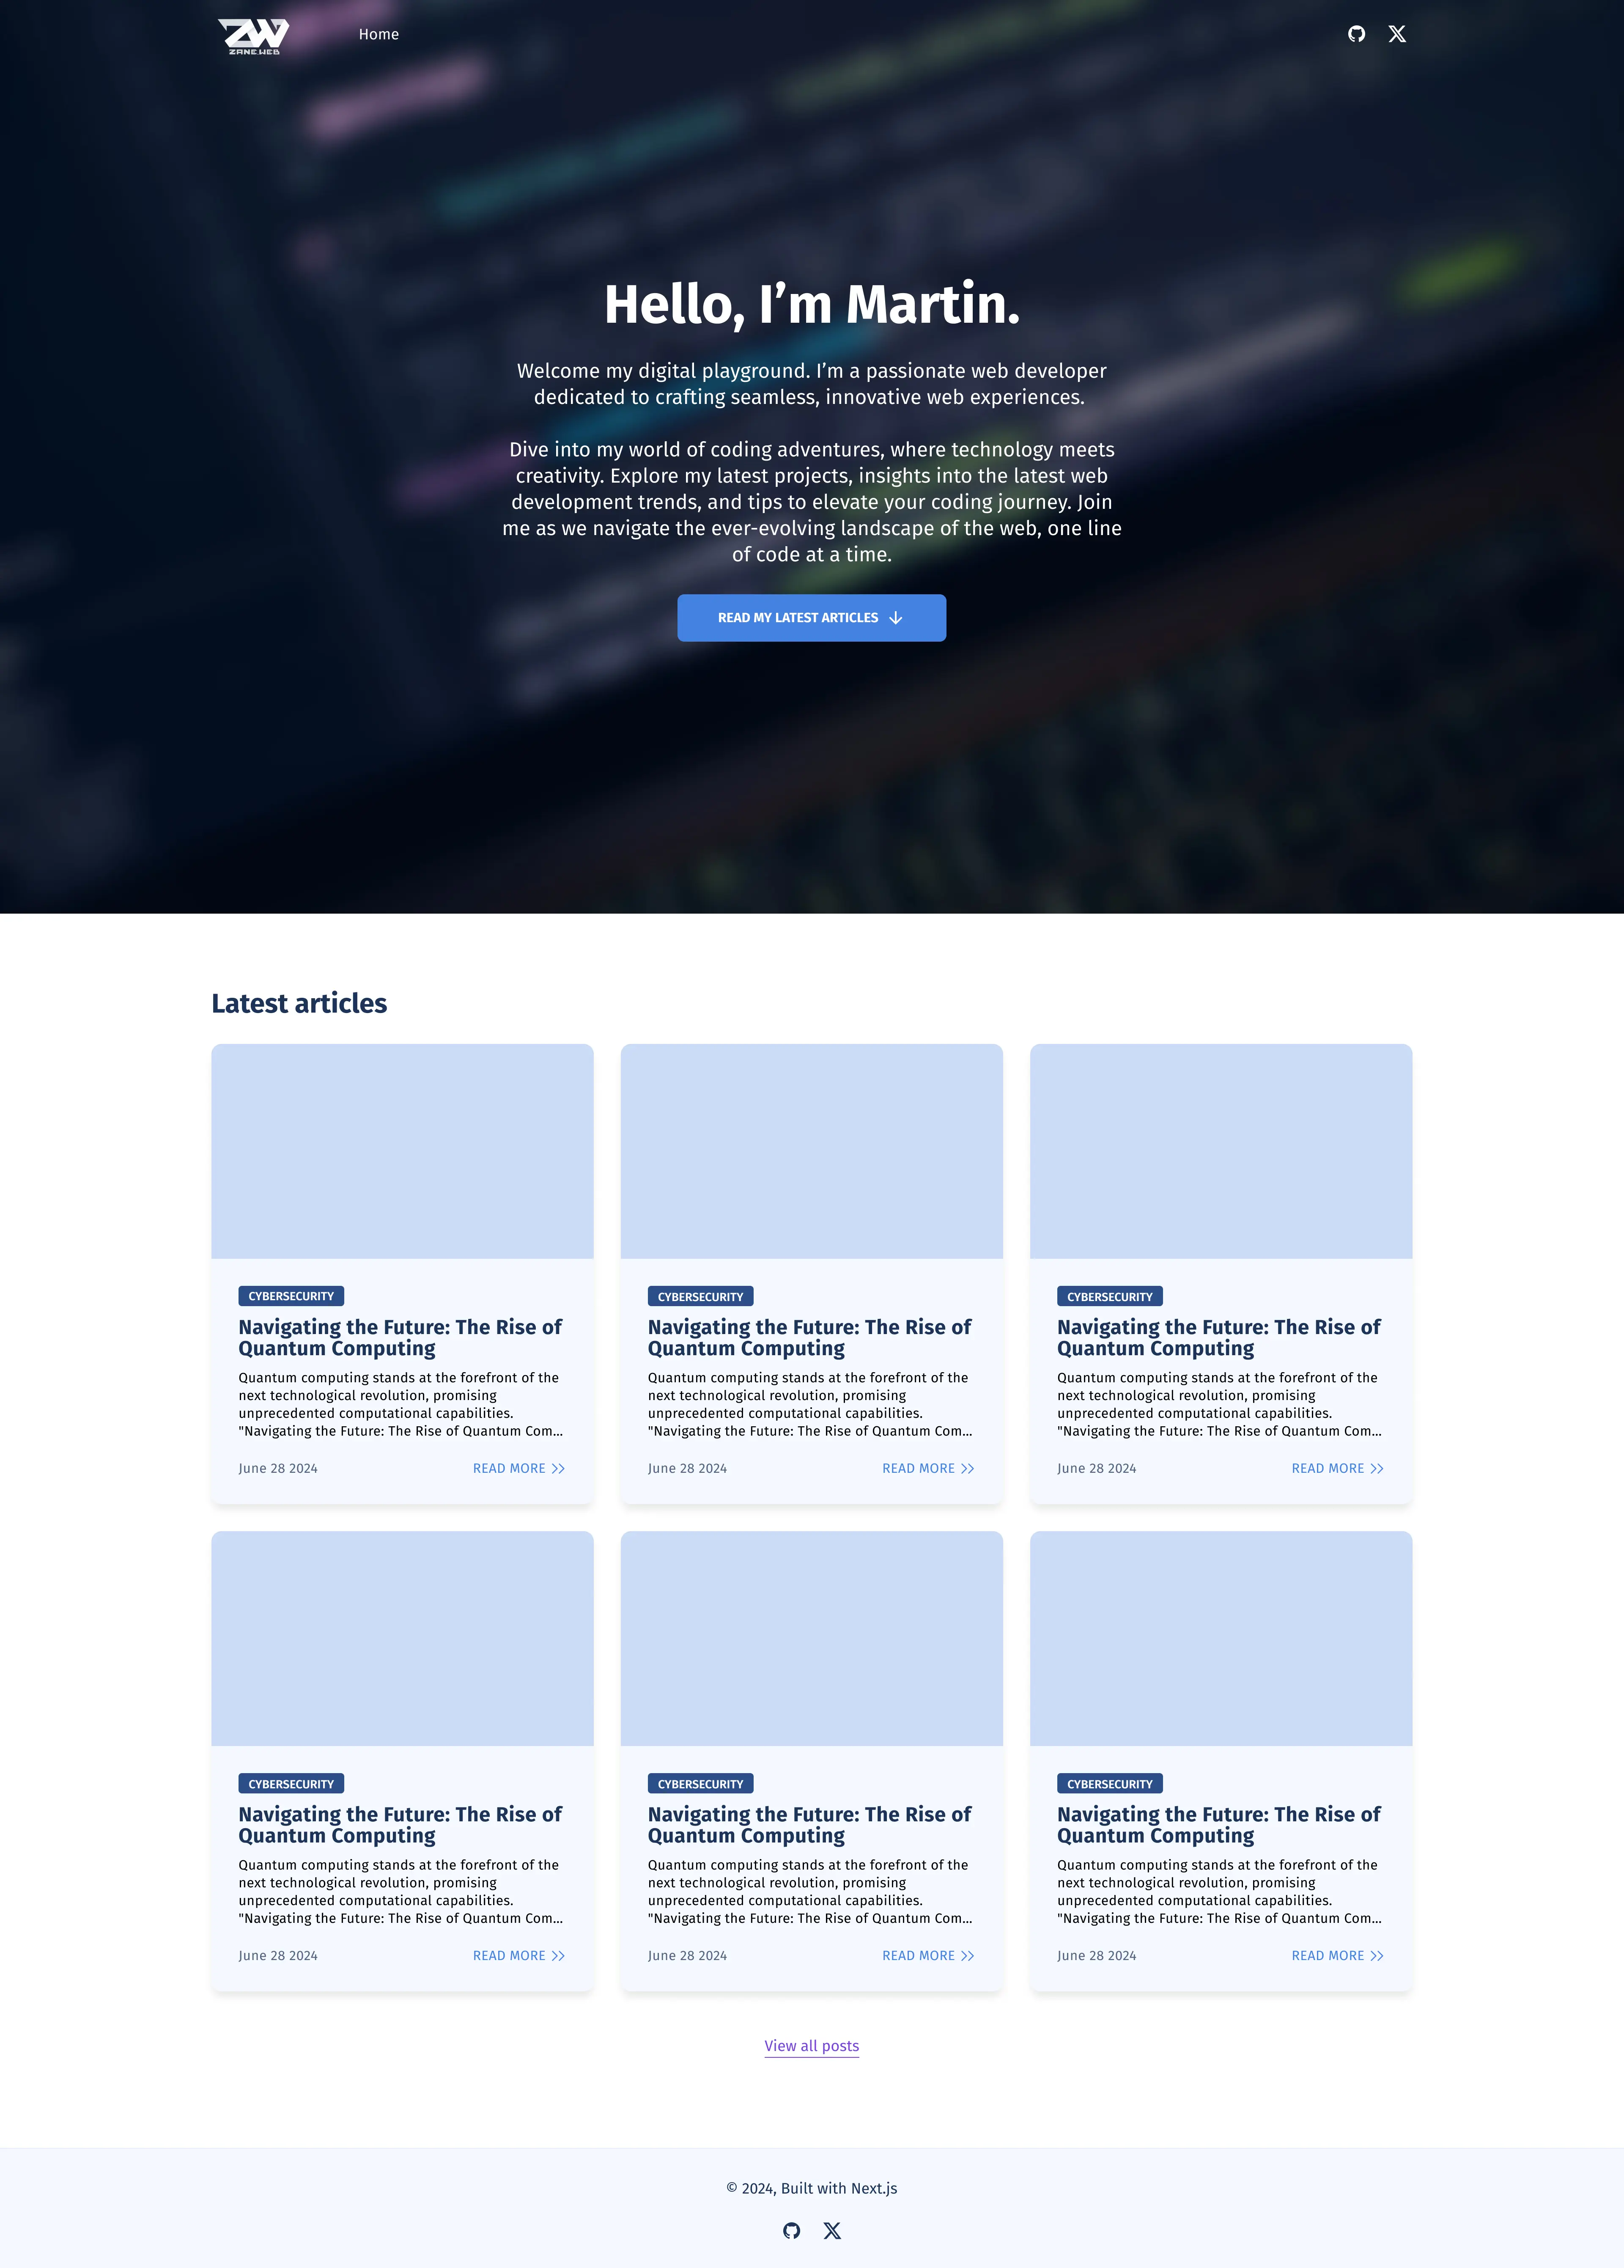
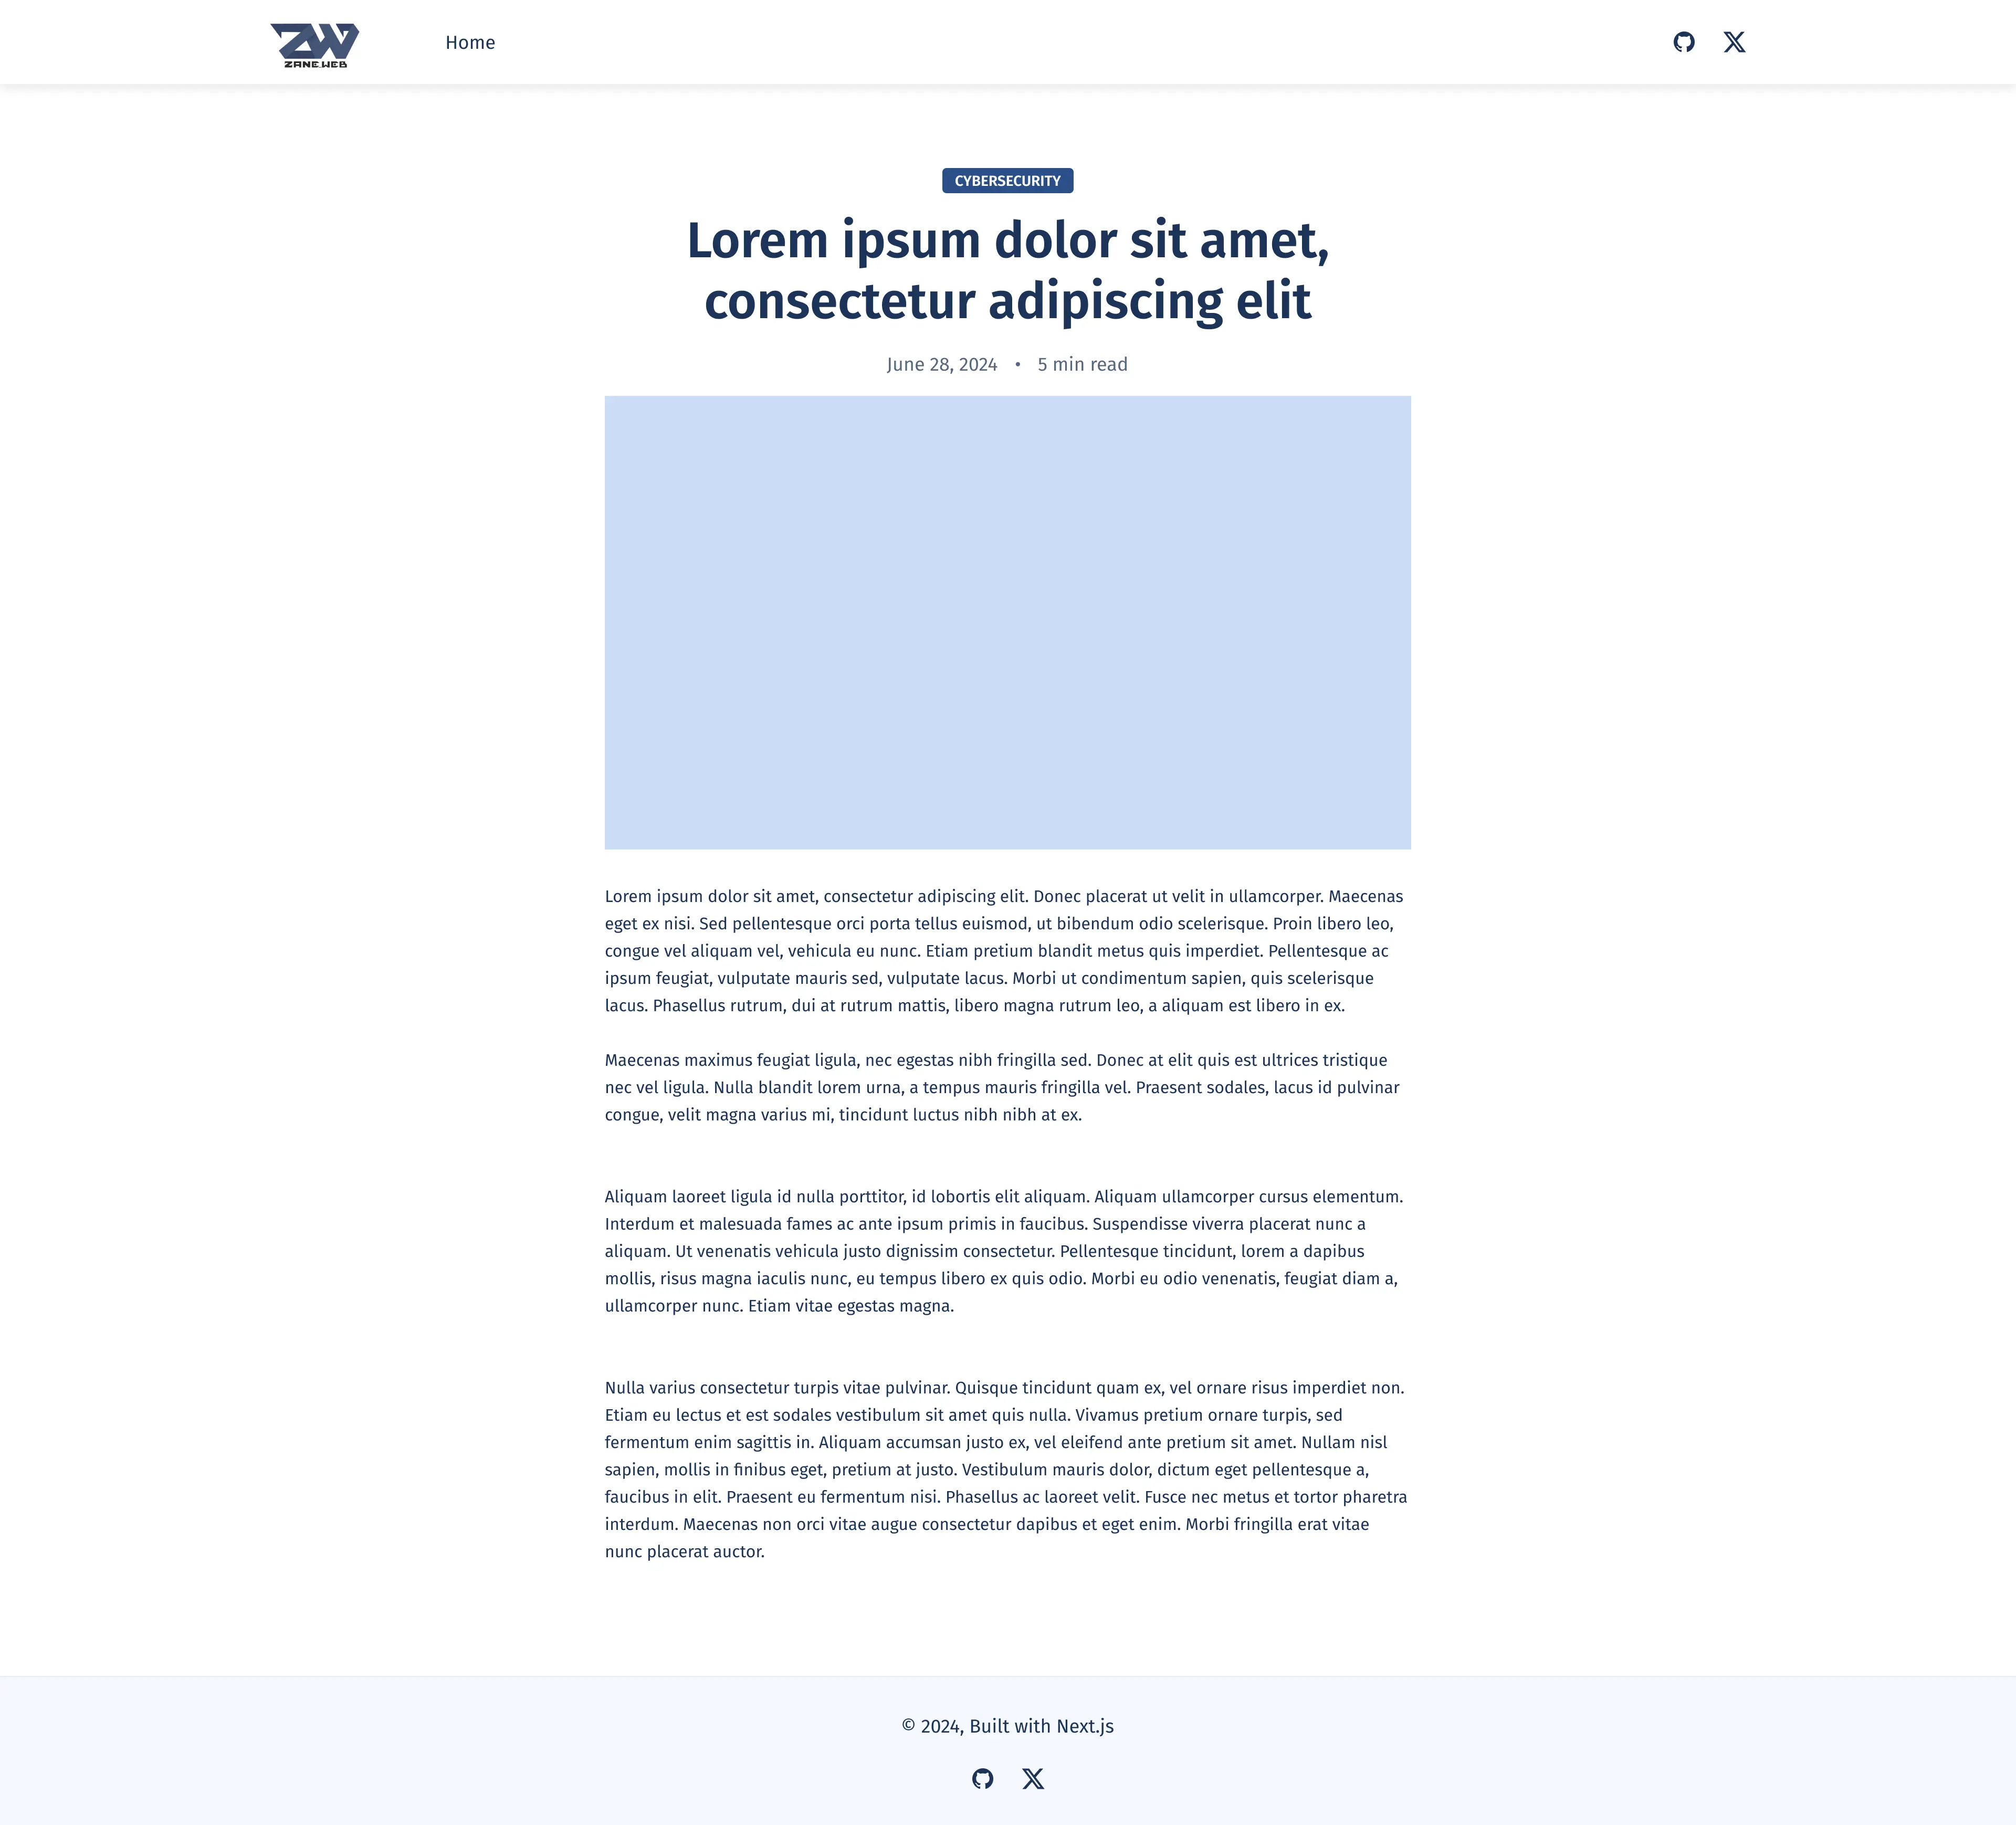
For the pages, I kept a lot of the initial ideas I had, with a few tweaks here and there. I ended up scratching the featured post section, though, as I thought a full height hero section would look better and more modern. And as mentioned before, I moved some features out of the MVP to the backlog so that I could focus on getting the core functionality right and out as soon as possible. This is what the final design looked like:
Home page
Post page
I was finally happy with the design and ready to move on to the next step: building the site.
Tech stack
Of course, before actually building the site, I had to decide on a tech stack. I wanted to keep things simple and lightweight, but still modern and powerful. I decided to go with the following:
- Next.js: I chose Next.js because of its great developer experience, performance, and flexibility. It also has built-in support for static site generation, which is perfect for a blog.
- TypeScript: This one is a no-brainer for me. I am a big fan of TypeScript and use it in all my projects. It helps catch bugs early, improves code quality, and makes refactoring a breeze.
- Styled components: Probably my favorite styling solution at the moment. It keeps my JSX clean, allows me to use JavaScript to style my components, and it has great support for theming. What's not to like?
- Vercel: I've been using Vercel for a while now, and I love how easy it is to deploy Next.js apps with it. The integration is seamless, and the performance is great.
- MDX: I thought using a CMS would be overkill for a personal blog, so I decided to go with MDX for my content. I can write my posts in Markdown and embed React components directly in them, which is pretty cool.
- ESLint and Prettier: I always use ESLint and Prettier in my projects to enforce code quality and formatting standards. They help keep my code clean and consistent. I keep prettier off for markdown files, though, as it messes with the formatting.
- @trivago/prettier-plugin-sort-imports: This is a nice plugin that I use to sort my imports automatically. It's just another slight improvement to the clenliness of my code and requires no extra effort from me.
Building the site
Because of the time I spent designing the blog and planning my tech stack, developing the blog was super easy and straightforward. I won't go into too much detail here, but I'll give you a high-level overview of the process.
- Setting up the project: I created a new Next.js project with TypeScript and App router support, cleaned up the boilerplate, and installed the necessary dependencies.
- Defining the design system: I set up my folder structure, created a theme file with my color palette and typography, and imported my main font - Fira Sans.
- Building the components: I started creating my components. I guess you could build those in isolation with something like Storybook, but I mostly prefer to see them in context, so I built them directly in the pages. I like Storybook though, it's useful for bigger projects and client work.
- Creating the pages: I created the homepage and post page, using the components I had built. I also set up the layout, navigation, and footer components.
- Adding content: I created a
content/blogfolder in my project and added my MDX files there. I then set up a function to read the files and generate the necessary metadata for each post. I also created a custom MDX component to render the posts based on the @next/mdx package. I will probably make a separate post on how I did this. - Styling the site: As mentioned earlier, I used Styled Components for styling. There is a bit of a setup to get it working with Next.js, but once that's done, it's smooth sailing. I also created a global styles file to reset the default browser styles.
- Preparing to deploy: I added some metadata files (robots.txt, sitemap.xml, favicon) to my project, set up a simple 404 page, and added meta tags for SEO. I also optimized my images and added lazy loading. Next.js provides a very good image component that does this out of the box. I recommend checking out the Next.js' production checklist before deploying any Next.js app.
- Deploying the site: I set up a Vercel account, connected my GitHub repository, and deployed the site. I set up a custom domain and SSL certificate, and voilà, my blog was live!
Some good takeaways
Building any project, no matter how big or small, will always teach you something. Here are some of the lessons I learned from building my blog:
- Focus on the few, not the many: If you're working on your first side-project, or you've had a bunch of unfinished ones in the past, focus on getting one thing done and done well. Plan your MVP and keep it small and achievable. You can always add more features later on.
- Plan your tech stack: Spend some time upfront deciding on your tech stack. It will save you a lot of time and headaches later on. Choose tools and technologies that you're comfortable with and that make sense for your project. I find that researching and finding the right tools is half the fun of building a project.
- Design is important: Don't underestimate the power of good design. A lot of developers tend to focus on the code and functionality and neglect the design. But having a good design can make a huge difference in how your project is perceived. It's also a valuable skill to have as a developer.
- Perfection is the enemy of done: It's easy to get caught up in the details and try to make everything perfect. But perfection is a moving target, and you'll never reach it. It's better to get something out there and iterate on it based on feedback and your own learnings. Done is better than perfect.
Conclusion
It has been fun building my blog, and I am looking forward to document more of my projects and experiments here. You can reach me on X / Twitter if you have any questions or feedback.
Thanks for reading! 🫐